I have a thing for seasonal candy. New flavors, fun shapes, and limited time speak to my food love language. While shopping at Walmart the other day but I couldn’t tell you what I went there for because as soon as I saw the seasonal candy aisle had it’s Halloween makeover it was all over.
I filled my cart with everything my heart desired to bake, including the new Butterfinger Skulls that turned into 3 easy Halloween treats!
3 Easy Halloween Treats with Butterfinger Skulls
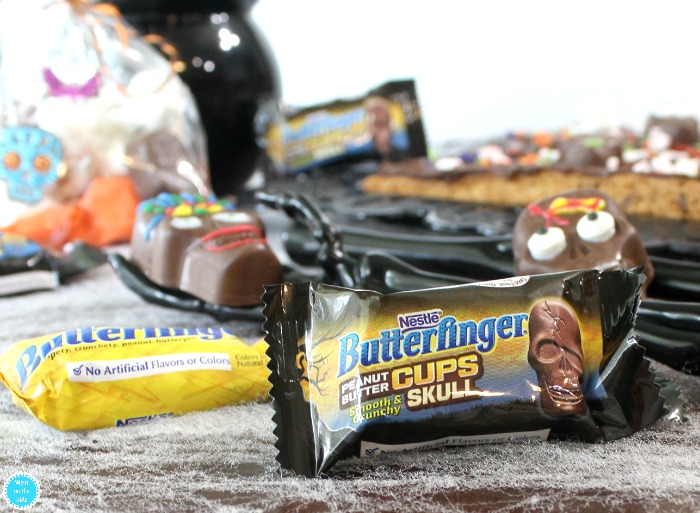
You can find Butterfingers and new Butterfinger Peanut Butter Cup Skulls in the candy aisle at Walmart right now. If your store is anything like my store, the cool new seasonal candies tend to sell out so get them early if you can.
Between decorating, baking, and snacking we’ve gone through two bags between the six of us, so grab a couple of the Butterfinger Skulls because YUM!

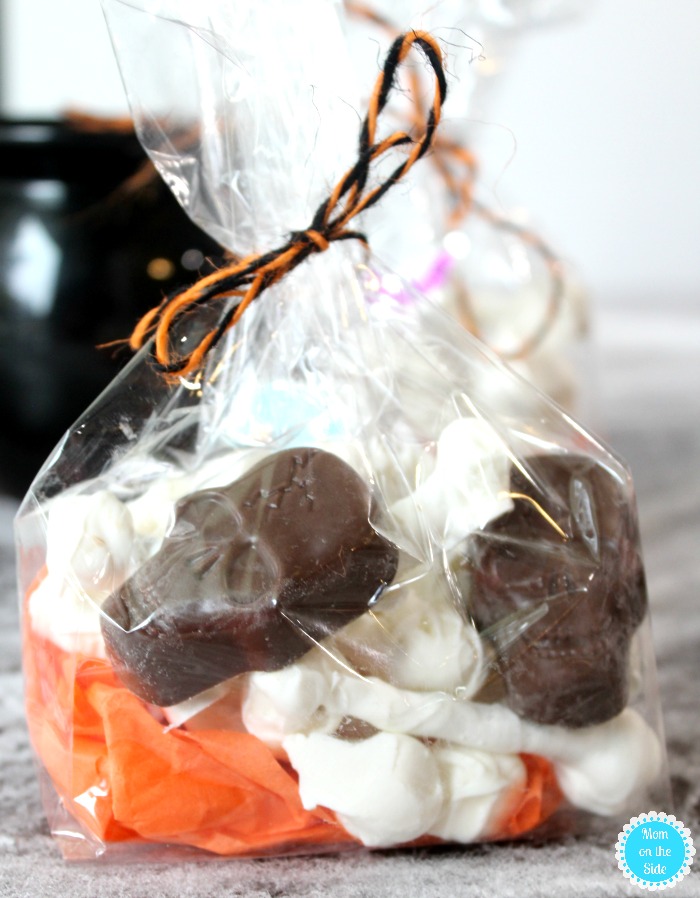
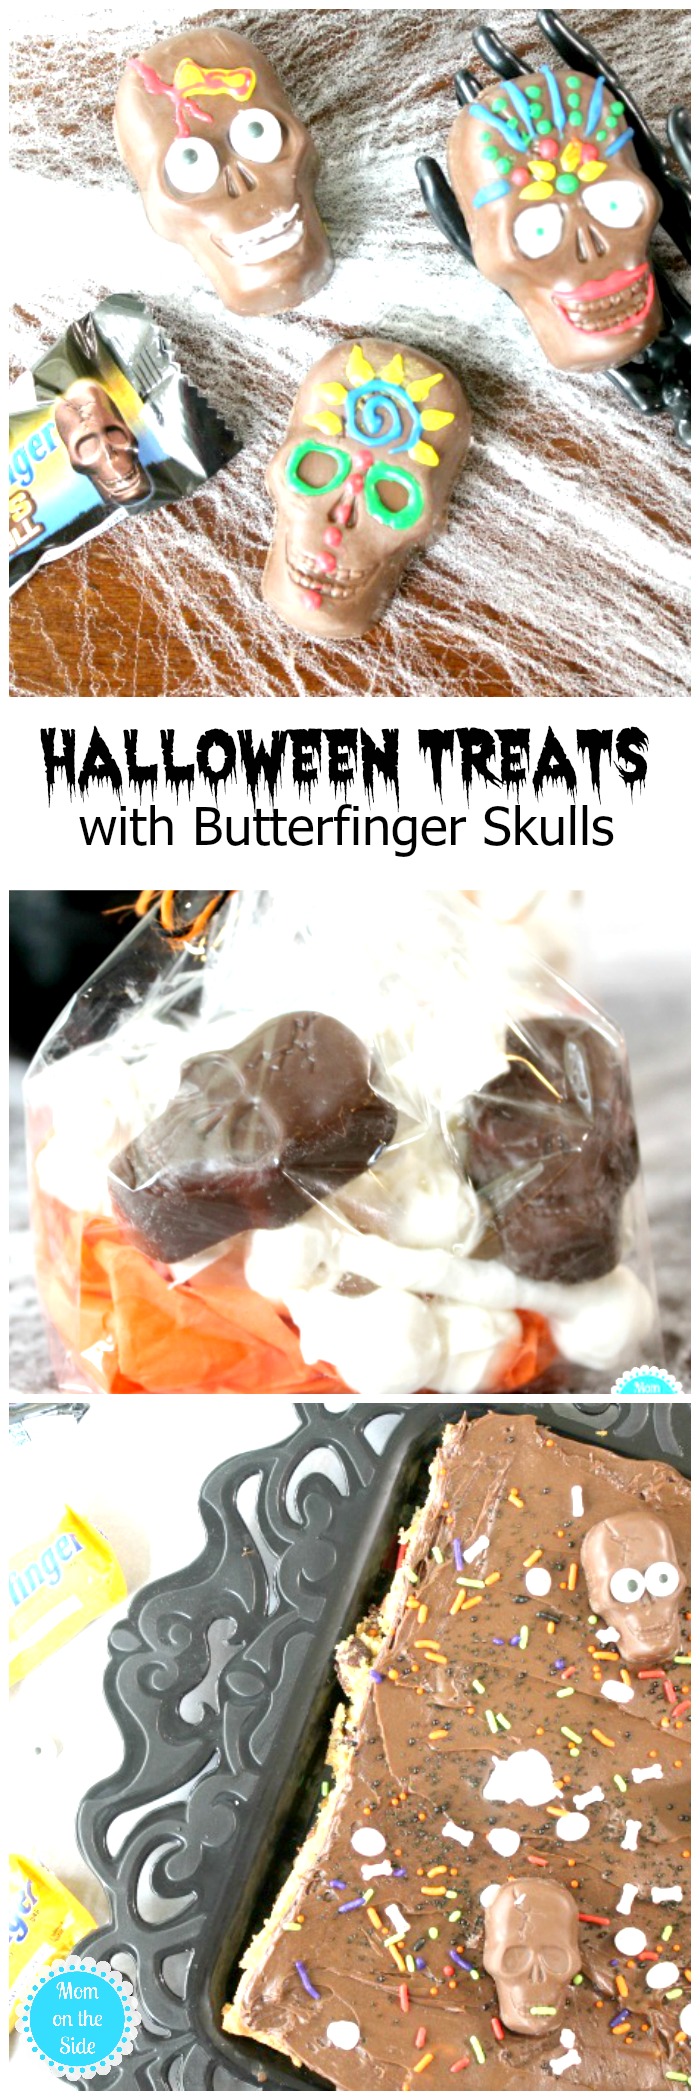
Bag o’ Skulls and Bones
The first Halloween treat I made were Bag o’ Skulls and Bones. These work great to hand out on Halloween, set out on tables at Halloween parties, and for classroom treats if you can still bring homemade goodies. Unfortunately, my kids’ schools don’t allow that so we made them for family and friends.
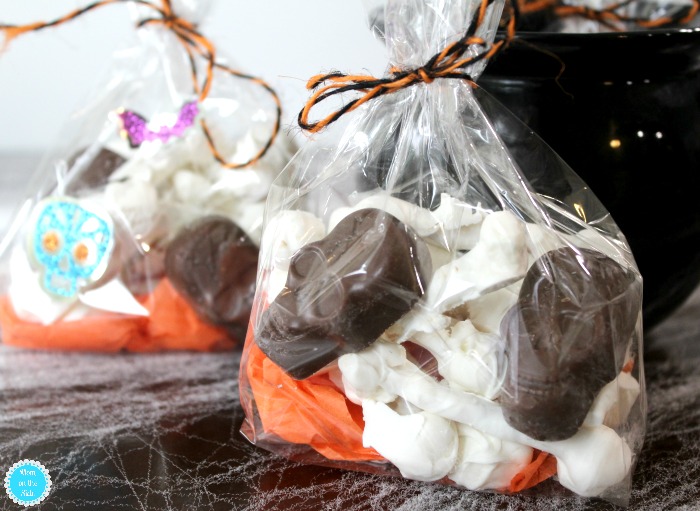
Bag o’ Skulls and Bones Supplies
- Pretzel Sticks
- Mini Marshmallows
- White Melting Chocolate
- Butterfinger Skull Cups
- Clear Treat Bags
- Tissue Paper
- Ribbon/Yarn and Stickers for decorating
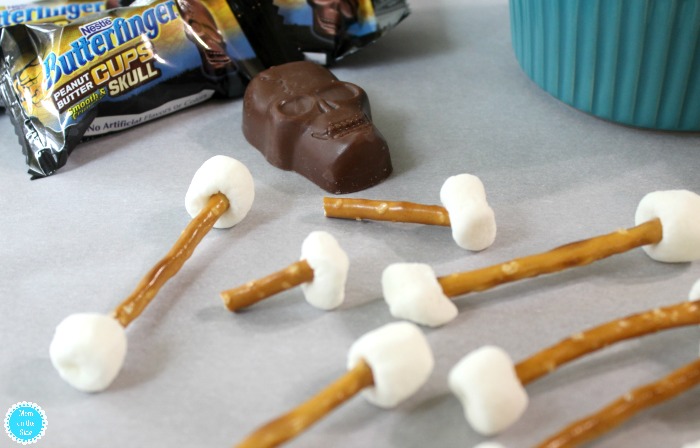
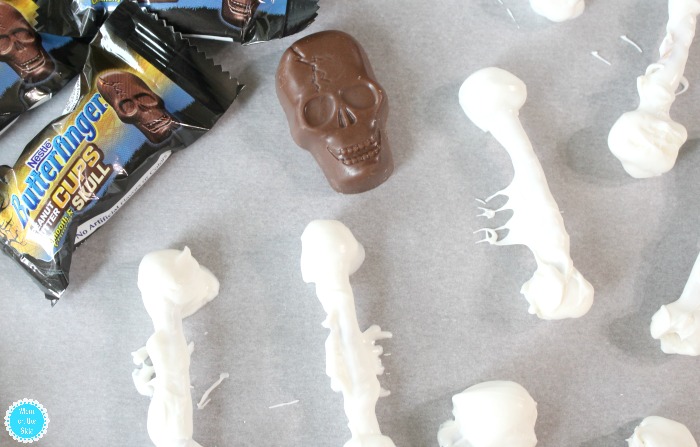
To make bones, simply stick mini marshmallows on each end of a pretzel stick. Dip them in white melting chocolate and let them harden in the fridge.
Once the bones have hardened, you can start assembling the bags. I used clear treat bags so you could see the skulls and bones through it. Crinkle up a piece of tissue paper in the bottom of the bag and fill it with 7 or 8 bones and two unwrapped Butterfinger Skulls.
Tie the treat bag shut with Halloween yarn and decorate it with stickers if you want. A super easy Halloween treat that is also super yummy!
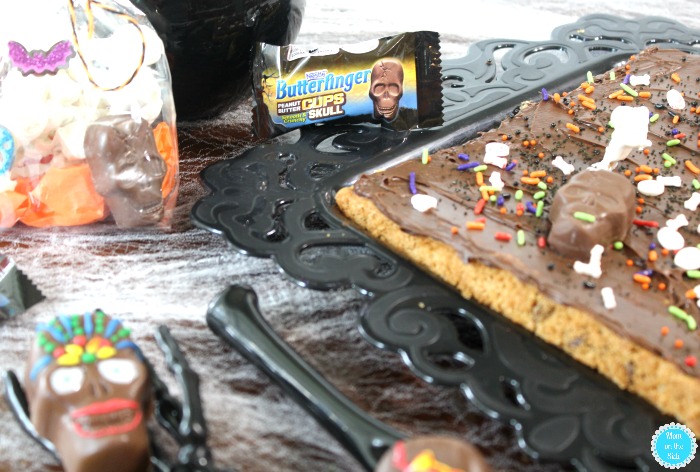
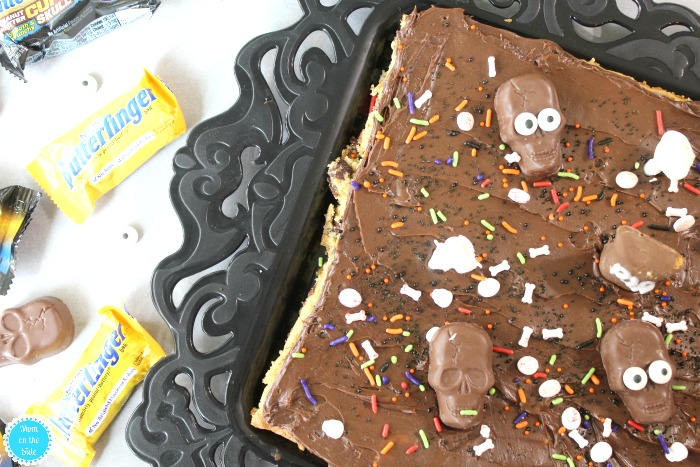
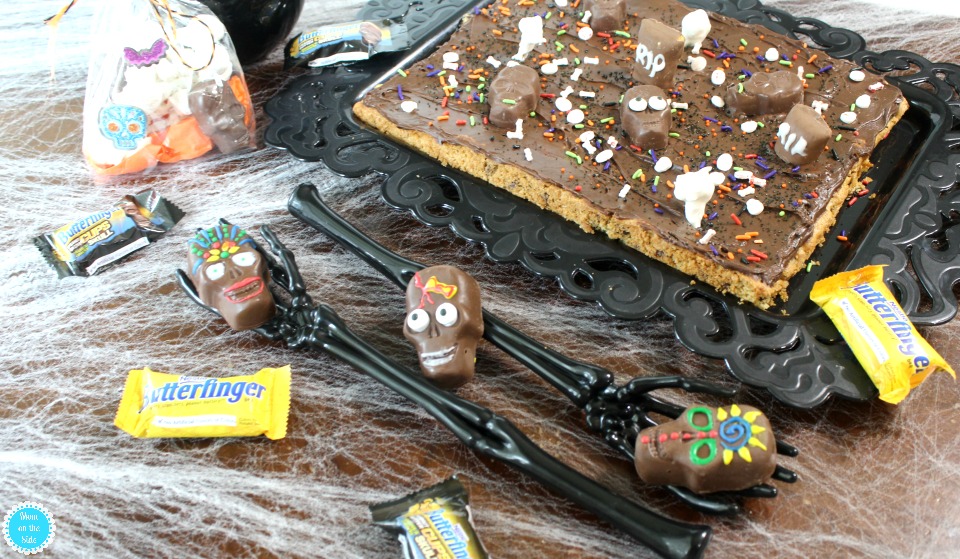
Cookie Bar Graveyard
The next Halloween treat I made was a Cookie Bar Graveyard. When the kids want cookies but I’m feeling lazy, I make cookie bars.
Basically, instead of scooping out individual chocolate chip cookies, I spread it into the pan and bake it like brownies. Normally I leave them as is, but for holidays I decorate the heck out of my cookie bars!
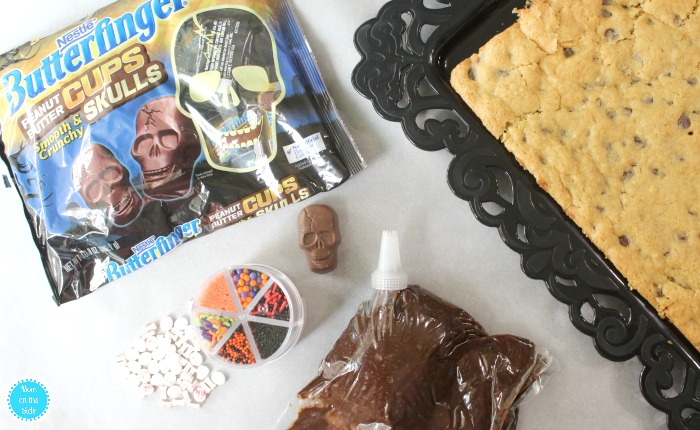
Cookie Bar Graveyard Supplies
- Chocolate Chip Cookie Mix & Ingredients (you can make homemade or prepackaged)
- Chocolate Frosting
- Butterfinger Skull Cups
- Halloween Sprinkles
I used prepacked chocolate chip cookie mix for the Cookie Bar Graveyard, baked at recommended temp for 15 minutes or until golden brown. Once it’s cooled, a layer of chocolate frosting makes the base for the graveyard.
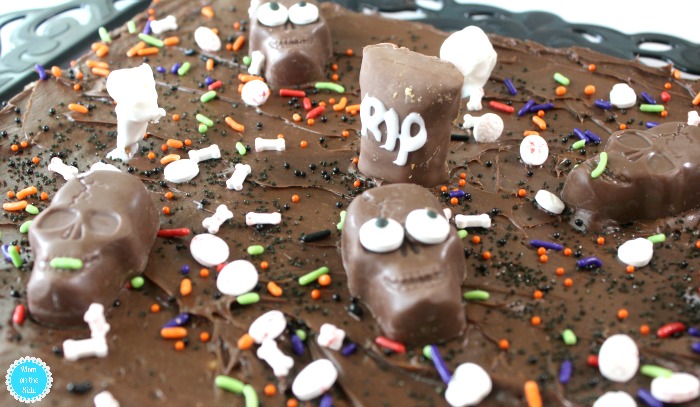
Once the cookie bar is covered in frosting, it’s time to decorate! Skulls and bones sprinkles were the perfect matches for a cookie bar graveyard. I also broke some of the pretzel bones and stuck them in the “ground” too.
Various Halloween sprinkles are great for covering the cookie bar with. The final touches are Butterfinger Skulls, some with candy eyes and some without, as well as regular Butterfingers, with one end cut off, for tombstones.
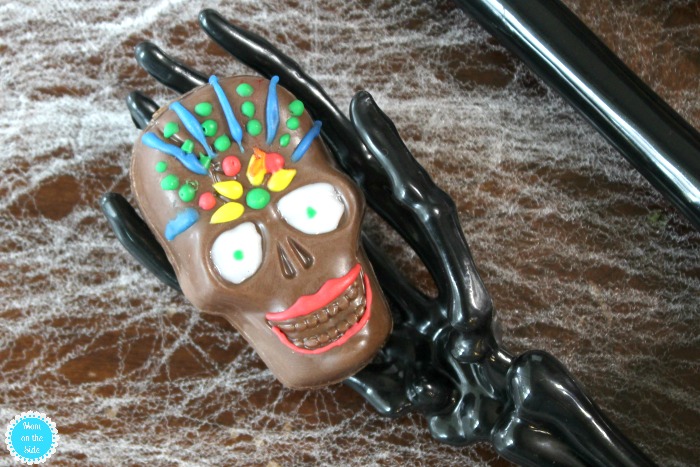
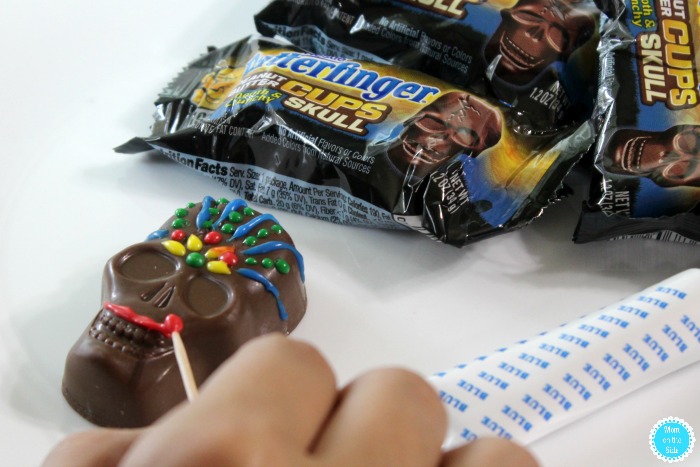
Decorated Butterfinger Skulls
The final Halloween treat for this decorating day were Decorated Butterfinger Skulls. My 15-year-old daughter is quite the artist, but she usually works with paint on canvases. She quickly showed that her skills transfer over nicely to the kitchen!
Decorated Butterfinger Skulls Supplies
- Decorator Icing
- Butterfinger Skulls
- Toothpicks
There is really no specific way to decorate Butterfinger Skulls. Grab a color and let your creativity guide you. Keep toothpicks close by for helping with fine lines and making designs out of dots. Candy eyes also add a fun touch to these as well.
Wouldn’t these be fun to set out at a Halloween party?! Almost to neat to eat but trust me, you want to. The Butterfinger Peanut Butter Cups Skulls are crunchy and creamy at the same time.
Peanut butter and chocolate are two of my favorite food groups and I’m a sucker for holiday-themed candy. I’ll be honest, if you come to my house on Halloween night I can’t promise there will be any left.

If I can whip up these Halloween treats in a few hours on a Saturday, anyone can. If you attempt the decorated skulls I’d love to see your photos!
Stop by the seasonal candy aisle at Walmart to find new Butterfinger Peanut Butter Cup Skulls, along with your favorite original Butterfingers in regular and jumbo packs.
Pin these Halloween Treats with Butterfinger Skull Cups for later!
Trina Oliveira says
Butterfingers are one of my favorite candies! I’ll be trying these for sure, the kids will love these recipes!